This article describes the steps needed to integrate Safous as an IdP to enable Single Sign On (SSO) to Drupal-based platform as the SP.
In this guide we are demonstrating it with Cloud Orchestrator, a Drupal distribution for cloud administrators and operators to manage and orchestrate multiple cloud platform, powered by Cloud module. It provides management for Amazon EC2, Kubernetes, OpenStack and Terraform Cloud, Amazon VPC/Networking and granular user permissions. You can find out more about the distribution on their project page here.
Prerequisites
- You have already set up a Drupal distribution with proper administrative access to install modules and configure changes, mainly related to user access settings.
- You have generated both X509 certificate and private key file.
Add and Install SAML Authentication Module
By default, the SAML authentication module has to be added and installed first to enable SAML authentication in order to use it for SSO. In this guide, we will add the module with Composer and install it using the Drupal UI.
- Add the SAML authentication Module
- Go to your Drupal project directory (note that it is located outside of your Drupal docroot)
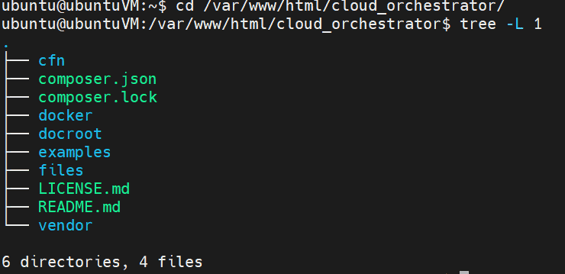
- As the web user, add the SAML authentication module with Composer
sudo -u www-data composer require 'drupal/samlauth:^3.9'
- Go to your Drupal project directory (note that it is located outside of your Drupal docroot)
- Install the SAML authentication module
- Login to your Drupal site as an administrator or another sufficient role
- Navigate to Manage > Extend
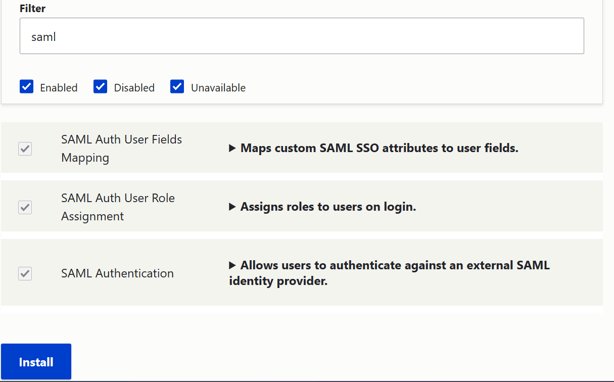
- Search for SAML
- Select all the modules and click install
Set Up SAML SP Configuration
Now that the SAML authentication module has been added and installed to your Drupal distribution, then the next step to do is to set up the SAML SP configuration.
- Navigate to Configuration > People > SAML authentication > Scroll down to Service Provider section
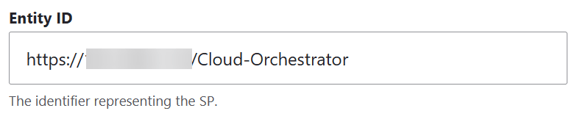
- Enter the Entity ID that represent your Drupal site. Enter the base URL of your Drupal site and enter a suitable Entity ID like this:
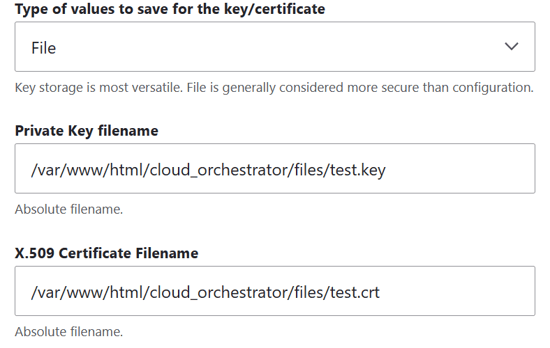
- Choose how you want Drupal to access your X509 Certificate and Key, either by storing it in Drupal key storage, accessing file in your server or just copy and paste the certificate and key value in configuration. In this example, we are using the file option.
- Enable the Sign metadata option
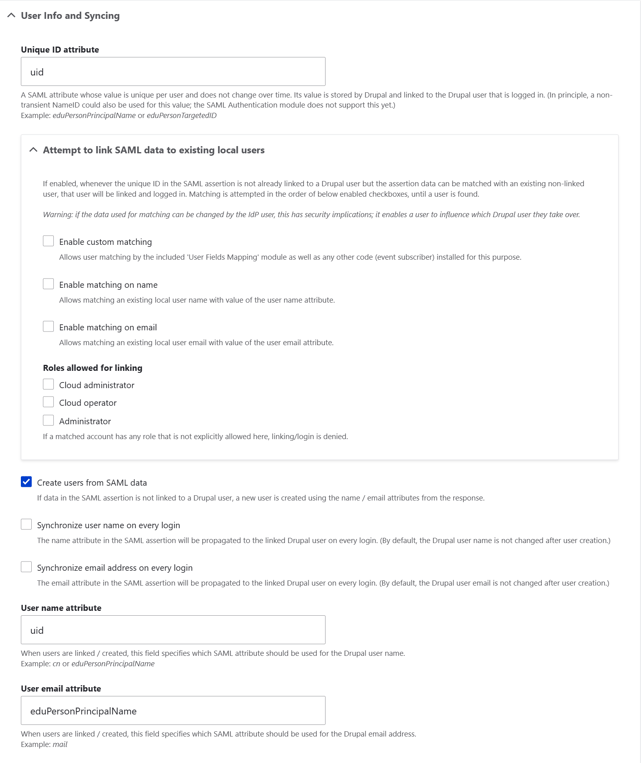
- Scroll down to User Info and Syncing section and configure the settings to resemble the image below:
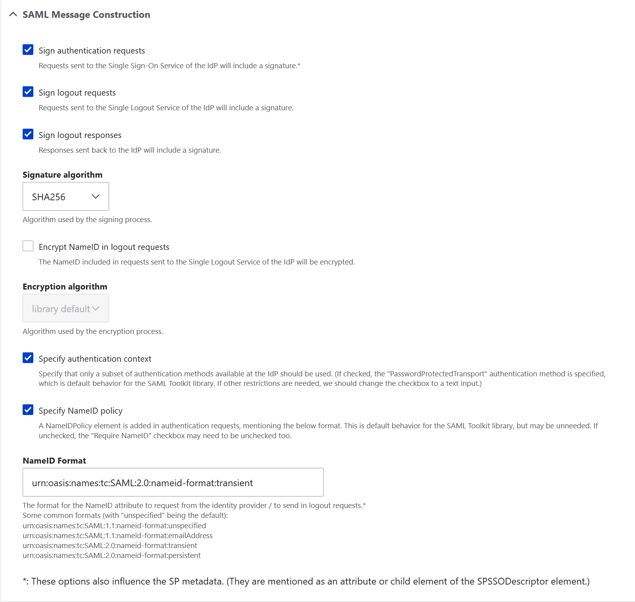
- Scroll down to SAML Message Construction section and configure the settings to resemble the image below:
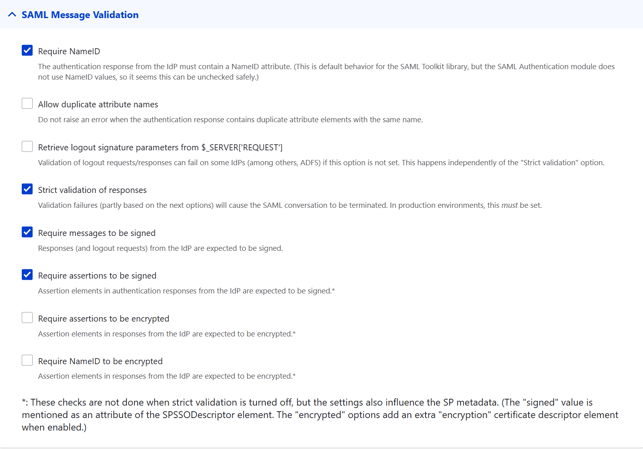
- Scroll down to SAML Message Validation section and configure the settings to resemble the image below:
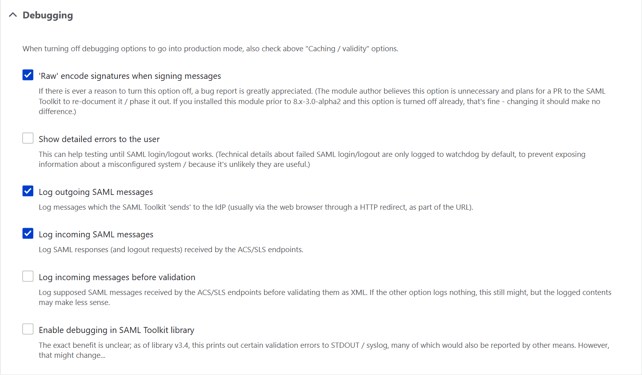
- (Optional) Scroll down to Debugging section and configure the settings to resemble the image below. This will be helpful for logging purpose and helping you troubleshoot SSO related problems or errors.
- Click Save configuration.
- Please copy or take note of the Entity ID and ACS URL generated as we will use it to register the Drupal distribution on Safous admin portal for the next steps.
Register Drupal as a SaaS Application on Admin Portal
As the setup for Service Provider in Drupal has been configured, we can register the Drupal distribution as a SaaS application on the admin portal.
- Go to Settings > ZTNA > Applications > SaaS, then click the New SaaS button.
- Enter the name for the SaaS application.
- Choose the site.
- Enter the previously copied ACS URL.
- Enter the previously set up Entity ID.
- Enter the Relay State URL of your choice.
- Enable the Allow IDP-Initiated Flow toggle.
- Configure the Categories and Policies to associate to the application.
- Click Save.
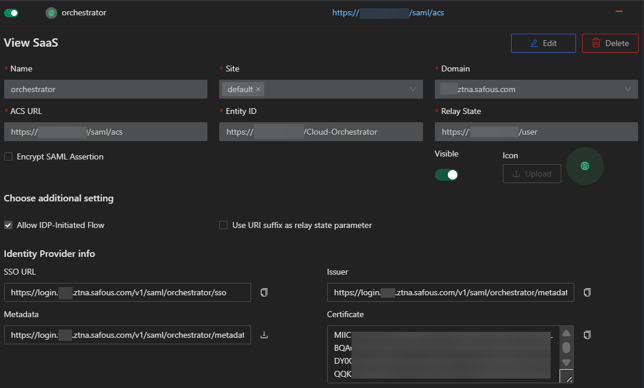
- Your newly created SaaS application should resemble the image below. Please copy or take note of the generated SSO URL, Issuer and Certificate.
Configure Safous as an IdP on Drupal
This time we will register Safous as the IdP to use for SAML authentication on your Drupal site in order to enable SSO.
- Go back to your Drupal site, still on the Configuration > People > SAML authentication page.
- Scroll down to the Identity Provider section.
- Enter the previously copied Issuer and paste it into the Entity ID field.

- Enter the previously copied SSO URL and paste it into the Single Sign On Service field.

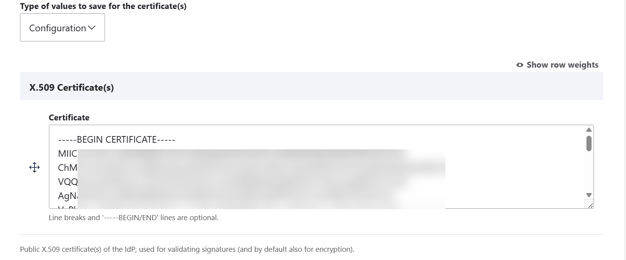
- Choose how you want Drupal to store the Safous generated X509 Certificate. In this example, we are using the configuration option for convenience.
- Click Save configuration.
Test the SSO
Now that the configuration to enable SSO has been done on both your Drupal site and the Safous admin portal, you can proceed to test the SSO.
- Login to your Safous tenant user portal
- Access the Drupal SaaS application
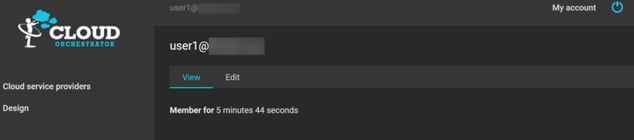
- Verify you are automatically logged into your Drupal distribution with Safous credentials.
Logs
You can check the logs for SAML authentication on your Drupal site logs and on Safous admin portal.
- On Safous admin portal, go to Analytics > ZTNA > Activity Log
-png.png?width=641&height=236&name=image%20(1)-png.png)
- On your Drupal site, navigate to Reports > Recent log messages
-png.png?width=636&height=302&name=image%20(2)-png.png)