The article outlines the necessary steps to configure Safous as an Identity Provider (IdP) to facilitate Single Sign-On (SSO) with Redmine serving as the Service Provider (SP).
Prerequisites
- You have successfully set up a Redmine server with the necessary administrative access to install plugins and configure settings.
Add and Install SAML Authentication Plugin for Redmine
By default, the SAML authentication plugin has to be added and installed first to enable SAML authentication in order to use it for SSO. In this guide, we will add and install the plugin with Ruby Gem bundler as mentioned on the plugin's Github page.
# Change to the directory of Redmine in your server
cd $REDMINE

# Clone the Github repositories of the plugins
git clone https://github.com/alphanodes/additionals.git plugins/additionals
git clone https://github.com/alphanodes/redmine_saml.git plugins/redmine_saml

# Copy configuration to config/initializers/ - could be any file name
cp plugins/redmine_saml/contrib/sample_saml_initializers.rb config/initializers/saml.rb

# Make your SAML configuration in this file - or just leave it as it is as we will configure it later
vim config/initializers/saml.rb

# Install the plugin
bundle install
bundle exec rake redmine:plugins:migrate RAILS_ENV=production
Set Up SAML SP Configuration in Redmine
Now that the SAML authentication plugin has been added and installed to your Redmine, then the next step to do is to set up the SAML SP configuration.
- Open the SAML configuration file with a text editor
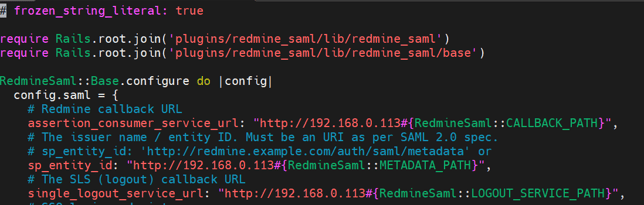
- Change the value for these parameters to your Redmine site's URL:
- assertion_consumer_service_url
- sp_entity_id
- single_logout_service_url
- Save the SAML configuration file. Your configuration for the SP should resemble the image below:
- Restart Redmine.
sudo -u www-data touch $REDMINE/tmp/restart.txt
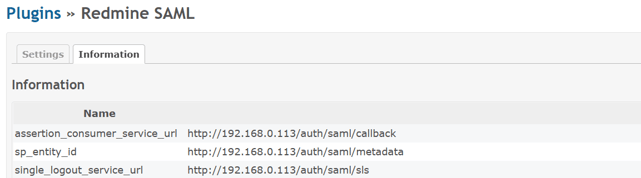
- Check the SAML configuration on Redmine website by logging in as an administrator and navigate to Administration > Plugins > click configure on Redmine SAML plugin > Information. Copy or take note of the generated URLs for the previously mentioned parameters, as we will use them to configure Redmine SaaS application on Safous admin portal.
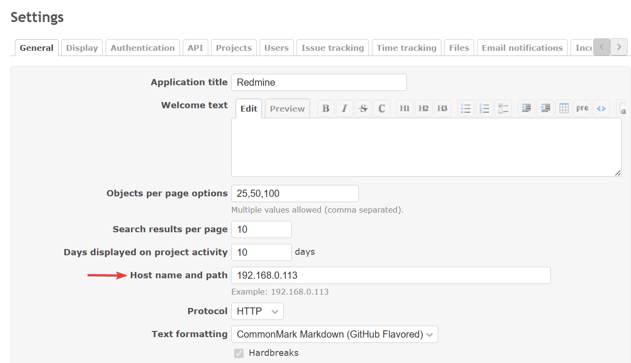
- Navigate to Administration > Settings and change the value for Host name and path parameter to your Redmine site's URL
- Navigate back to Administration > Plugins > click configure on Redmine SAML plugin > Information. Scroll to the bottom and verify that your SAML SP parameters have check mark next to the URL.

- Remove the restart file.
sudo rm $REDMINE/tmp/restart.txt
Register Redmine as a SaaS Application on Safous Admin Portal
As the setup for Service Provider in Redmine has been configured, we can register Redmine as a SaaS application on the admin portal.
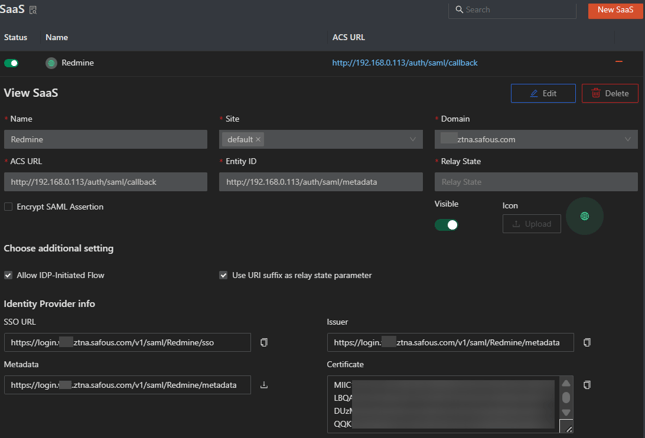
- Go to Settings > ZTNA > Applications > SaaS, then click the New SaaS button.
- Enter the name for the SaaS application.
- Choose the site.
- Enter the previously copied ACS URL.
- Enter the previously set up Entity ID.
- Enter the Relay State URL of your choice.
- Enable the Allow IDP-Initiated Flow toggle.
- Enable the Use URI suffix as relay state parameter toggle.
- Configure the Categories and Policies to associate to the application.
- Click Save.
- Your newly created SaaS application should resemble the image below. Please copy or take note of the generated SSO URL and Certificate.
Configure Safous as an IdP on Redmine
This time we will register Safous as the IdP to use for SAML authentication on Redmine in order to enable SSO.
- Open the SAML configuration file with a text editor
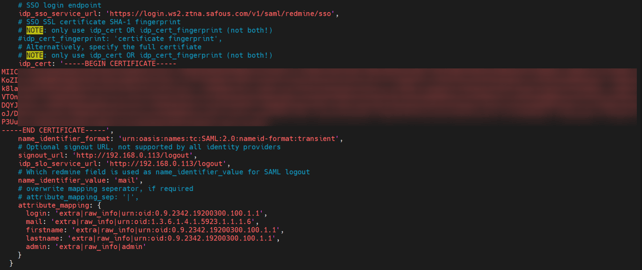
- Set the value for idp_sso_service_url to the copied value of SSO URL.
- Comment out idp_cert_fingerprint parameter
- Set the value for idp_cert to the copied value of Certificate.
- Set name_identifier_format to urn:oasis:names:tc:SAML:2.0:nameid-format:transient
- Set signout_url and idp_slo_service_url to <Redmine URL>/logout
- Set the value for attribute mapping to:
- login, firstname, lastname: extra|raw_info|urn:oid:0.9.2342.19200300.100.1.1
- mail: extra|raw_info|urn:oid:1.3.6.1.4.1.5923.1.1.1.6
- Save the SAML configuration file. Your configuration for the IdP should resemble the image below:
- Restart Redmine.
sudo -u www-data touch $REDMINE/tmp/restart.txt
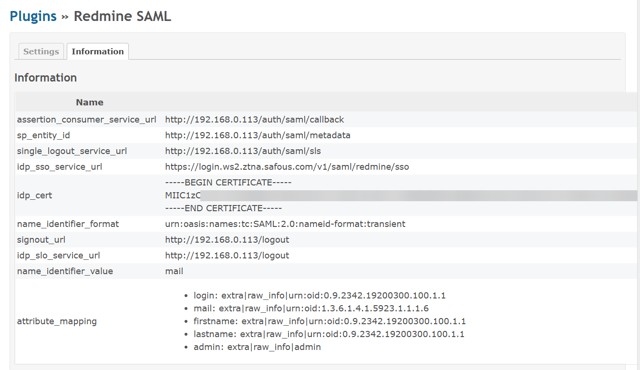
- Check the SAML configuration on Redmine website by logging in as an administrator and navigate to Administration > Plugins > click configure on Redmine SAML plugin > Information. The whole plugin information should resemble the image below:
- Remove the restart file.
sudo rm $REDMINE/tmp/restart.txt
Test the SSO
Now that the configuration to enable SSO has been done on both your Redmine site and the Safous admin portal, you can proceed to test the SSO.
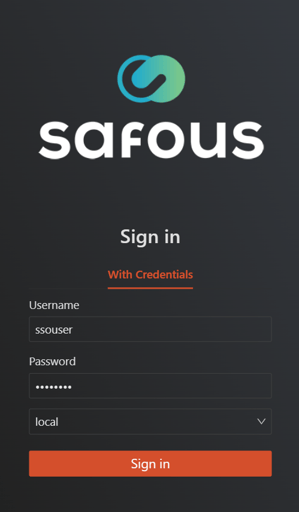
- Login to your tenant user portal
- Access the Redmine SaaS application
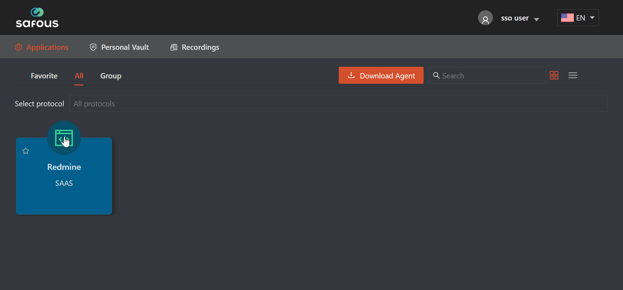
- Verify you are automatically logged into Redmine with Safous credentials.
Logs
You can check the logs for SAML authentication on your Redmine logs and on Safous admin portal.
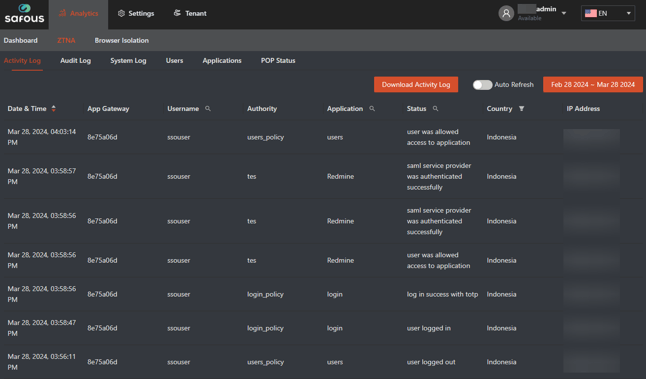
- On Safous admin portal, go to Analytics > ZTNA > Activity Log
- On your Redmine server, check the logs on $REDMINE/logs

