The article outlines the necessary steps to configure Safous as an Identity Provider (IdP) to facilitate Single Sign-On (SSO) with Nextcloud serving as the Service Provider (SP). In this article, we are demonstrating it with Nextcloud version 29.0.2 and SSO & SAML authentication app version 6.1.3.
Prerequisites
- You have access to the Nextcloud administrator account.
Register Nextcloud as a SaaS Application on Safous Admin Portal
Please follow the steps outlined below to register Nextcloud as a SaaS application on the Admin portal.
- Go to Settings > ZTNA > Applications > SaaS, then click the New SaaS button.
- Enter the name for the SaaS application. In this example, the name is simply nextcloud.
- Choose the site.
- Enter https://<Nextcloud>/apps/user_saml/saml/acs as the ACS URL. Replace <Nextcloud> with your Nextcloud domain.
- Enter https://<Nextcloud>/apps/user_saml/saml/metadata as the Entity ID. Replace <Nextcloud> with your Nextcloud domain.
- Enter https://<Nextcloud>/apps/user_saml/saml/acs as the Relay State. Replace <Nextcloud> with your Nextcloud domain.
- Enable the Visible toggle button.
- Enable the Allow IDP-Initiated Flow toggle.
- Configure the Categories and Policies to associate to the application.
- Click Save.
- Your newly created SaaS application should resemble the image below. Please copy or take note of the generated SSO URL, Issuer and Certificate.
-png.png?width=688&height=400&name=image%20(4)-png.png)
Add and Install SSO & SAML Authentication App on Nextcloud
By default, the app has to be added and installed first to enable SAML authentication in order to use it for SSO. In this guide, we will add and install the app through the Nextcloud console.
- Open your Nextcloud domain and login with administrator account.
- Navigate to Apps > Featured Apps.
- Scroll down and find SSO & SAML authentication App.
- Click Download & enable.
-png.png?width=688&height=351&name=image%20(5)-png.png)
- Navigate to Apps > Your Apps and verify that the SSO & SAML authentication app is installed and enabled for your Nextcloud.
Set Up and Configure Safous as an IdP on Nextcloud
This time we will register Safous as the IdP to use for SAML authentication on Nextcloud in order to enable SSO.
- Navigate to Administration settings > SSO & SAML authentication
- Select built-in SAML authentication.
- Configure Global settings
- Enable the Allow the use of multiple user back-ends (e.g. LDAP) option
-png-2.png?width=688&height=272&name=image%20(6)-png-2.png)
Enabling this option allows you to select the login method between direct login using password or through SAML. Later, you can disable this option if you want to enforce login via SAML only once all the settings and configurations are finished.
- Enable the Allow the use of multiple user back-ends (e.g. LDAP) option
- Configure General settings
- (Optional) Change the name of the IdP from Provider 1 to Safous.
- Set Attribute to map the UID to urn:oid:0.9.2342.19200300.100.1.1.
- Set Optional display name to Safous.
-png-1.png?width=688&height=236&name=image%20(7)-png-1.png)
- Configure Service Provider Data
- Set Name ID format to Unspecified.
- To generate a certificate, open a shell and execute the specified command.
openssl req -nodes -new -x509 -keyout private.key -out public.cert
- Paste the content of public.cert to X.509 certificate of the Service Provider.
- Paste the content of private.key to Private key of the Service Provider.
-png-1.png?width=688&height=436&name=image%20(8)-png-1.png)
- Configure Identity Provider Data
- Set the Identifier of the IdP entity to the copied Issuer.
- Set the URL Target of the IdP to the copied SSO URL.
- Set the URL location of the IdP to https://users.<tenant>.ztna.safous.com/cyolo/v1/logout
- Set the URL Location of the IDP'S SLO Response to your user portal login page (e.g. https://login.<tenant>.ztna.safous.com/
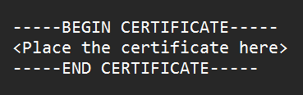
- Paste the Certificate to Public X.509 certificate of the IdP and format it like this
Once done, your configuration should be similar to the example below.-png-1.png?width=688&height=553&name=image%20(10)-png-1.png)
- Configure Security Settings
- Enable all the settings as exactly shown in this example
-png-2.png?width=688&height=450&name=image%20(11)-png-2.png)
- Enable all the settings as exactly shown in this example
- Click Download Metadata file on the bottom of the page to verify that all the configurations are done and saved.
Testing SSO
As the set up and configurations are done, we will now continue to test the SSO to ensure that we can SSO to Nextcloud via SAML.
- Go to your Safous tenant's user portal and log in with your credential.
- Click on the nextcloud SaaS application.
-png.png?width=688&height=315&name=image%20(12)-png.png)
- As previously we have enabled the option to select the login method, we will be asked to choose which method to use to login to Nextcloud. Choose login with Safous.
-png-2.png?width=688&height=315&name=image%20(13)-png-2.png)
Note that you can disable this login method selection and only allow to login via Safous by disabling the option on Global Settings. - If you see this message, then you have successfully done SSO to Nextcloud via SAML. Your account is automatically provisioned the first time you log in to Nextcloud via SAML, so you don't have to manually create and map user between Safous and Nextcloud.
-png-1.png?width=688&height=315&name=image%20(14)-png-1.png)
- As we also have configured SLO, if you click the Log out button on Nextcloud, then you will be logged out too from the Safous user portal.
-png-1.png?width=688&height=313&name=image%20(15)-png-1.png)
Logs
You can check the logs for SAML authentication on Safous admin portal and any SAML authentication error logs on the Nextcloud logs.
- On Safous admin portal, go to Analytics > ZTNA > Activity Log

- On Nextcloud, login with administrator account and navigate to Administration settings > Logging. There you can find the error messages you would need to troubleshoot problems related to the SAML authentication.
-png.png?width=688&height=351&name=image%20(16)-png.png)