This article will help you on how to integrate Entra ID (formerly known as Azure AD) into Safous ZTA service as the external Identity Provider for authentication.
Prerequisites
Before continuing the steps in this article, please ensure you already have:
- Account in Azure AD with these privilege
- Role Administrator or Global Administrator
- Enterprise app role permissions to read and update
Azure AD Enterprise Application Configuration
- Go to Microsoft Entra Admin Center > Applications > Enterprise Applications

- Click on "New Application"

- Next click on "Create your own application"

- Fill the information about your app name and choose "Register an application to integrate with Microsoft Entra ID (App you're developing)", then click "Create".

- After that, set the "Redirect URI (optional)" setting to select the Web option, and then click "Register."

- Return to the Enterprise Applications page, where you will locate the application you previously created. Click on the application to proceed.

- Navigate to "Single sign-on", then click "Go to Application"

- Access the "Expose an API" section, where you will need to generate the "Application ID URI" by clicking on the Add button.

- After generating and setting the URI, click "Save." This will create the "Application (client) ID," which you can later find in the Overview section.

- Next, proceed to Authentication section and click on "Add a Platform"

- Options will open on the right side of web page, then choose Web

- Next you need to enter the value of Redirect URIs. Enter the callback URL provided by the User Portal of your tenant (e.g https://login. <tenant>.ztna.safous.com:443/v1/auth/openid/1/callback). After that, click "Configure."
- This callback URL can be obtained once you have configured an OpenID Identity Provider in the Admin Portal.
- You might need to change the URL if you have multiple OpenID IdP, which can be seen in the Admin Portal later on.

- Next, navigate to the "Certificates & secrets" section. Here, you will need to create a new client secret by clicking on the "New client secret" button.

- The options for creating a client secret will appear on the right side of the page. You have the option to provide a description for the client secret and select the desired expiration period for it. After making your selections, click "Add" to proceed.

- A new client secret will be generated. Please make sure to record the Value for the secret, as you will need it for the OpenID registration process in the Admin Portal later.

- Check the API permissions section to ensure that the "User.Read" permission has been successfully added.

- Click "Grant admin consent for <tenant>" then click yes on the confirmation prompt.


- Verify that the status has been changed to "Granted for <tenant>"

- Next navigate to the Overview section where you will need to take notes of these values:
- Application (client) ID

- Directory (tenant) ID

- Application (client) ID
- Get the attribute mapping for the Username and Email
- Copy Metadata URL

- Open in your browser and paste the link so it will open the XML metadata for the application

- Scroll down until you found the Claim of available attributes. Take notes of the claims that you will use (for example, name). You can use this metadata as a reference when configuring attributes mapping on the Safous admin portal later.

- Copy Metadata URL
- Lastly you will need to add Users or/and Groups to be assigned in the Enterprise Application that you created. To do this, return to the Enterprise Applications page, where you will locate the application you previously created. Click on the application to proceed.
- Next, navigate to the "Users and groups", and click Add user/group.

- Select the users and/or groups you wish to assign to the application. Keep in mind that only these designated users and groups will have access to the Safous ZTA User Portal after the integration is complete.


- That completes all the necessary configurations in Entra ID.
Configuring IdP in Safous Admin Portal
-
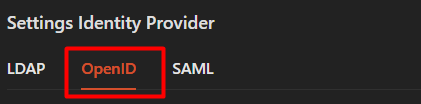
Go to Settings > ZTNA > Configurations > Identity Provider. Click New IdP, it will expand the form of IDP which you will need to configure.

-
Fill in the name and ensure that the status of the IdP is enabled (green).

-
Ensure you are choosing the OpenID for the identity provider setting
-
You need to choose and decides which OpenID scopes that you want to enable. These are some information about those options:
-
openid (required; to indicate that the application intends to use OIDC to verify the user's identity)
-
email (so you know where to send the welcome email)
-
profile (so you can personalize the email with the user's name)
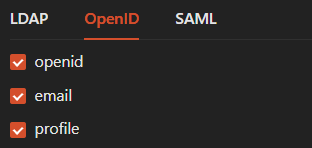
If you are still unsure, we strongly suggest to check/ticking all options.
-
-
Enter the value for OpenID Issuer with this URL format:
https://login.microsoftonline.com/{tenant_id}/v2.0 Change the {tenant_id} placeholder with the value of Directory (tenant) ID that you took notes previously from Entra ID.

-
Enter the value for Client ID with the value of Application (client) ID that you took notes previously from Entra ID.

-
Enter the value for Client Secret with the value of Value that you took notes previously from Entra ID.

-
Fill in both required "Username attribute" and "Email Attribute" with supported claims such as name, preferred_username (UPN) and email. In this example we are using the "name" claim for the Username attribute and "preferred_username" claim for the Email attribute. You can also optionally map other attributes by matching it with available attributes in the application metadata.

-
For the rest of Safous ZTA OpenID configuration, please refer to here.
-
Once you are done with the configuration, click "Save".

-
The page will display notification to inform you that the IdP has been added successfully.

-
Verify your Redirect URI is correct by comparing it with the Reply URL that you have previously configured in EntraID.


-
If the "Redirect URI" matches, you can retain the current setting. However, if there is a discrepancy, you will need to update the URI in Entra ID to ensure it aligns with the one configured in the Safous admin portal.
-
If everything is configured correctly, you can log in to the user portal (https://login.<tenant>.ztna.safous.com) and choose to log in With IdP, where you will see the option to continue with your integrated Entra ID OpenID IdP.

