OpenID Identity Provider Configuration
As mentioned in the Getting Started with Safous article, you can integrate with 3rd party identity service that leverages OpenID authentication approach.
Prerequisites
Before you continue to the article, please ensure that you have:
- Access to the Safous Admin Portal
Configuring OpenID Identity Providers in Safous Admin Portal
- Login to Safous Admin portal
- Navigate to Settings tab > ZTNA > Configurations > Identity Provider. It will display the list of identity providers that have been integrated. By default, it only has local IdP if you have not integrated with other IdP yet.

- Click on the New IdP button, it will expand the form of IDP which you will need to configure.

- Fill in the name and ensure that the status of the IdP is enabled (green).

- Ensure you are choosing the OpenID for the identity provider setting.

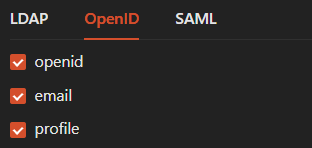
- You need to choose and decides which OpenID scopes that you want to enable. These are some information about those options:
-
openid (required; to indicate that the application intends to use OIDC to verify the user's identity)
-
profile (so you can personalize the email with the user's name)
-
email (so you know where to send the welcome email)

-
- You need to configure the OpenID settings according to the external Identity Provider you wish to integrate. For details about some know IDP integration can be found in here.

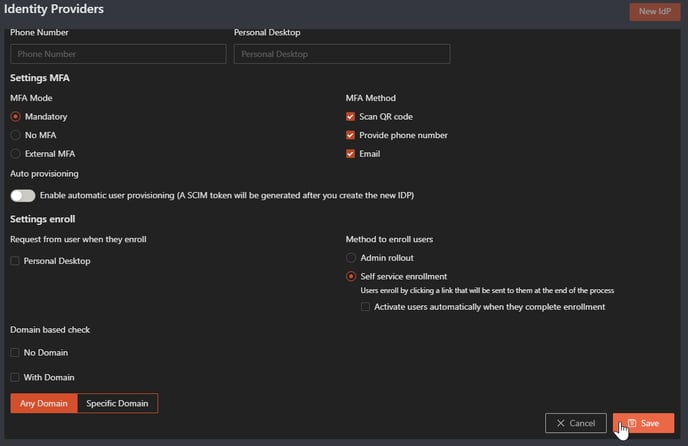
- You can configure settings for MFA by choosing the MFA mode and MFA methods. Available MFA mode options are Mandatory, No MFA, and External MFA. By default, it is set to Mandatory.

- In Mandatory MFA mode, the settings for MFA utilize Safous' built-in methods, which include scanning a QR code and providing a phone number. You can also enable MFA using Email if you have configured it as mentioned in this article.
- If you choose No MFA mode, the users who are using the IdP will not be asked to enter MFA when they login to the user portal.
- If you choose External MFA, Safous will delegate the users' MFA verification to the IdP. The available MFA methods defer to the MFA settings configured in that IdP.
- You can optionally enable automatic user provisioning from the IdP using SCIM, if the IdP has the capability to support SCIM provisioning. For more details regarding SCIM, please refer to this article.

- On the Settings enroll, you can request user information for Personal Desktop by enabling the option.

- You can choose the enrollment behavior for the Identity Provider that you wish to integrate.

- Admin rollout --- Means that every user needs to be added by the admin in Users page.
- Self service enrollment --- Means user who uses this IdP can directly be enrolled by themselves, but not yet activated. Enable Activate users automatically when they complete enrollment so the user can automatically be activated.
- Once you are done with the configuration, click "Save"

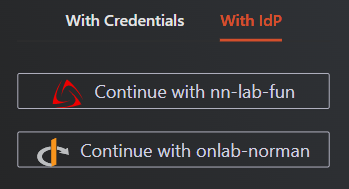
- If everything is configured correctly, you can log in to the user portal (https://login.<tenant>.ztna.safous.com) and choose to log in With IdP, where you will see your integrated OpenID external IdP.

