This article explains how to configure Microsoft Entra (previously Azure AD) for SCIM automatic provisioning so that user information is matched in both Safous and Entra.
Prerequisites
-
Read the article here on how to configure Safous’ IdP Auto-Provisioning. All the steps in that article must be implemented for the feature to function. For Microsoft Entra, you will need the SCIM endpoint and token credentials copied from Step 11.
-
To use this feature, you must configure the Microsoft Entra external IdP for Safous before enabling SCIM. Please refer to these guides for the configuration:
-
It is useful to be proficient in how to add, delete, edit, de-activate, and re-activate users on Microsoft Entra.
-
We currently support profile creation, deletion, and updates for user profiles.
-
Microsoft Entra has an up to 40-minute time frame for syncing with the Safous platform. To get around this time frame, Microsoft Entra allows for provisioning on demand. See the instructions below.
Configuring Microsoft Entra
- Log in to the Microsoft Entra Admin Center Dashboard.
- Select the Enterprise Application from the list of Entra services.
- Find the existing Safous Enterprise application that you are currently using for SSO. Go to the Navigation menu. In the Manage section, select Provisioning, and click the Get Started button.
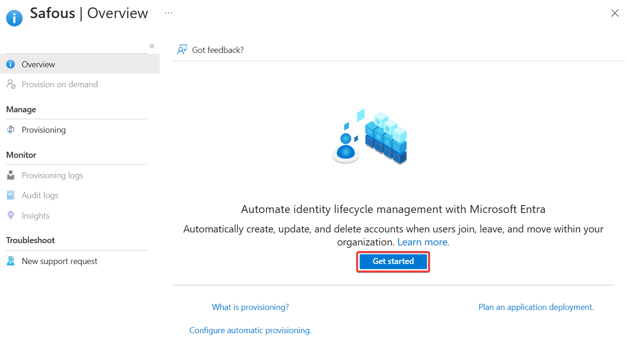
- Under Provisioning Mode, select Automatic.
- Under Admin Credentials enter the Tenant URL and Secret Token obtained from SCIM configuration for Microsoft Entra. Paste the SCIM Endpoint in the Tenant URL field and the SCIM Provisioning Token in the Secret Token field.
- Click Test Connection to confirm that the connection is set up correctly. In the top right-hand corner, the screen will say “The supplied credentials are authorized to enable provisioning,” which means that the sync is successful.
- Click Save button at the top of the screen.
-png.png?width=645&height=793&name=image%20(9)-png.png)
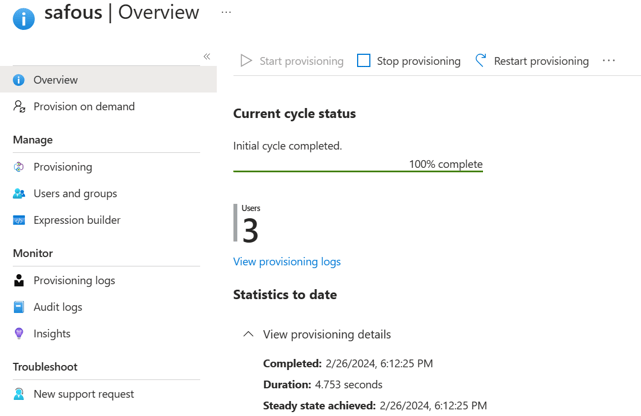
- Click Start provisioning.
-png.png?width=631&height=725&name=image%20(10)-png.png)
- To check that the users were added, return to Safous Admin Portal and navigate to Settings > Accounts > Users screen and look for the added users. It will list the user profile and the name of the IdP it came from.
-png.png?width=632&height=360&name=image%20(15)-png.png)

Note:
- Microsoft Entra has an up to 40-minutes time frame to sync users.
- Changing Microsoft Entra default attributes can cause failure to sync users, please ensure matching precedence on unique attributes.
- Microsoft Entra doesn’t support SCIM sync of nested groups.
Force Provisioning
You can add users or groups and force provision on demand without needing to wait for 40 minutes. Please follow the steps below to do so.
- Return to the Microsoft Entra provisioning screen and click the Users and Groups tab on the left.
- Search for a user(s), assign them roles (as a user), and click the Assign button on the bottom left.
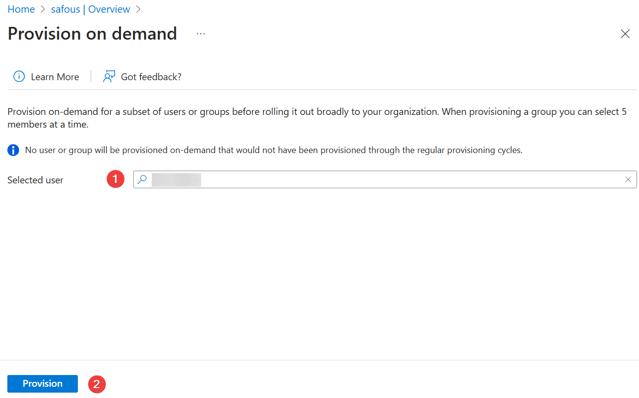
- Return to the Provisioning tab and click on the “Provision on Demand” from the top bar.
-png.png?width=638&height=660&name=image%20(11)-png.png)
- Select the user(s) using the search button and click the Provision blue button on the bottom left.
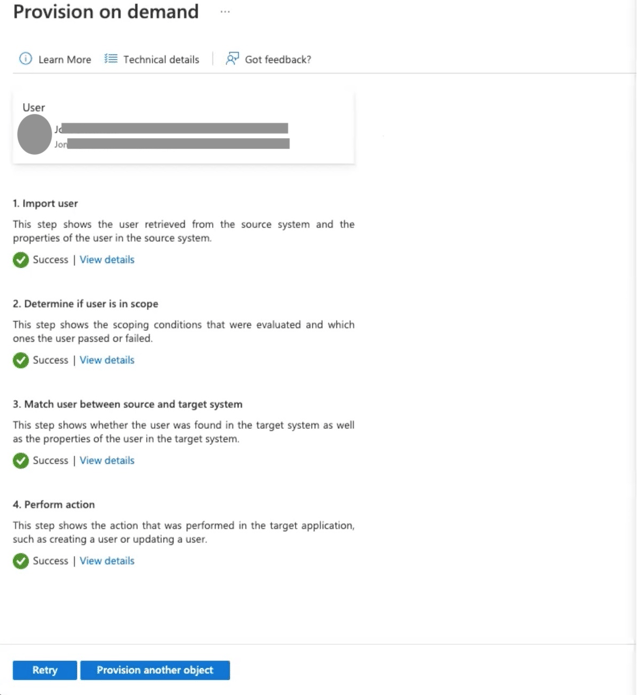
- The system will confirm if the user was provisioned successfully, and the screen will look like this:
Troubleshooting
-
When users are removed/deleted from Microsoft Entra, the latter sends disable commands to Safous. In the Admin portal, the user will receive a new username (e.g., from newusertest@v21ws.onmicrosoft.com to 249ab2e9b056407ea8489940d85edae3newusertest@v21ws.onmicrosoft.com) that is automatically disabled. Even if you delete a user from Microsoft Entra, the user will appear in Safous as disabled and not deleted.
-
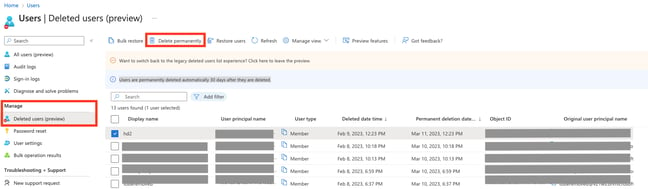
To provision permanent deletion from Microsoft Entra to Safous, delete the user in Entra and then navigate to the Manage tab, as shown in the screenshot below. Select the user again and select “Delete Permanently” (on the top tab):
-
If a quarantine error is received during on-demand provisioning in Microsoft Entra, click on the Restart Provisioning tab on the top of the Provisioning page and start the Provision on-demand process again as described above. Quarantine errors appear for a variety of reasons, primarily if the App Gateway is not available or as a result of errors received from Safous.
-
If the App Gateway is unavailable, Microsoft Entra puts auto-provisioning on hold. It will need to be restarted again from within the Microsoft Entra platform.
Logs
-
You can navigate to Analytics > ZTNA > Audit Log in the Admin console to find the logs events (create or update) for any change in the object. The update can mean that a user was de-activated. The number of ‘update’ messages may be larger than of the number of actual changes performed in Entra.

-
If the App Gateway server is unavailable, the logs will be created on the external IdP.