This article provides a step-by-step guide for integrating Okta as an external Identity Provider for authentication within the Safous ZTA service. Before you begin, please ensure that you have an Okta Workforce Identity Cloud account with administrative privileges.
Setup Okta SAML Application in Okta Admin Console
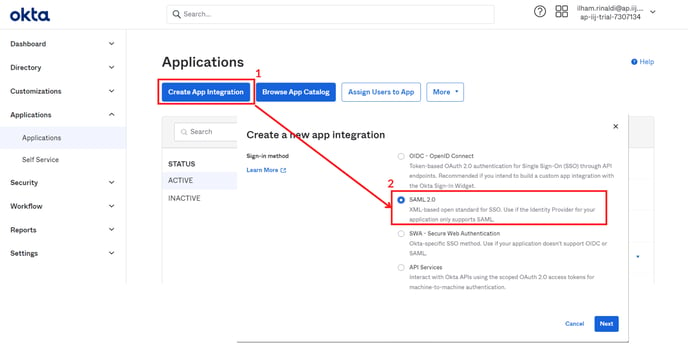
- Login to your Okta tenant admin console (e.g. https://<tenant>.okta.com/admin/apps/active)
- Proceed to create a new app integration, and select SAML 2.0
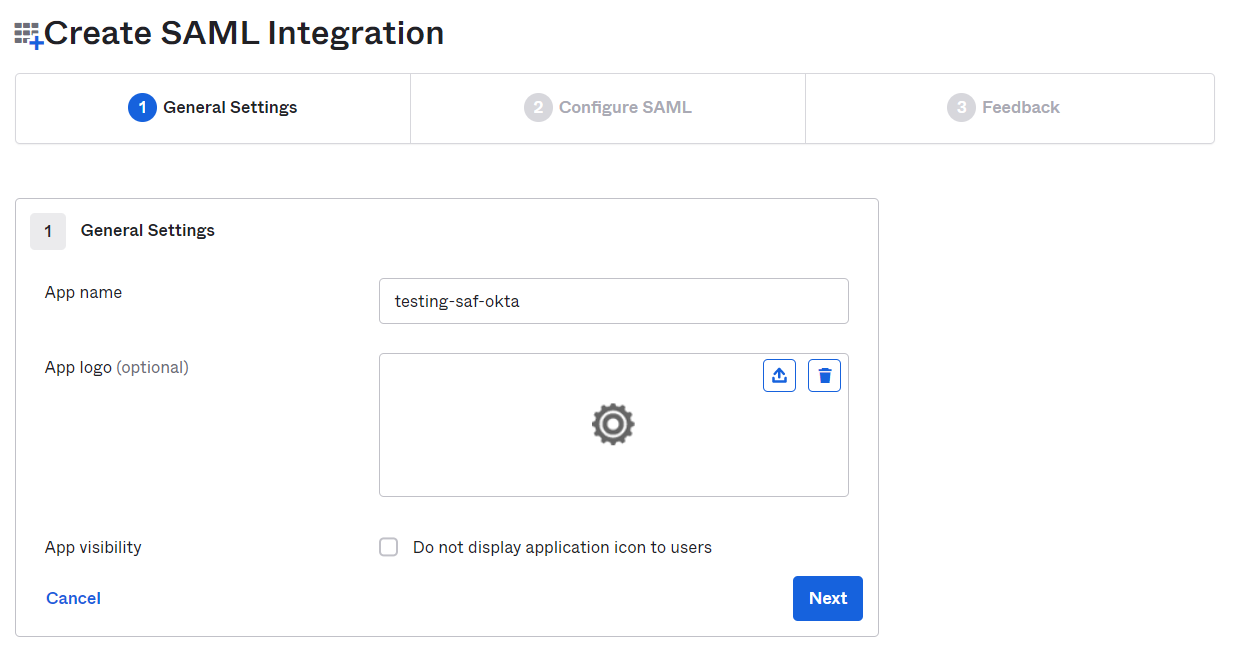
- Input your App Name and click Next
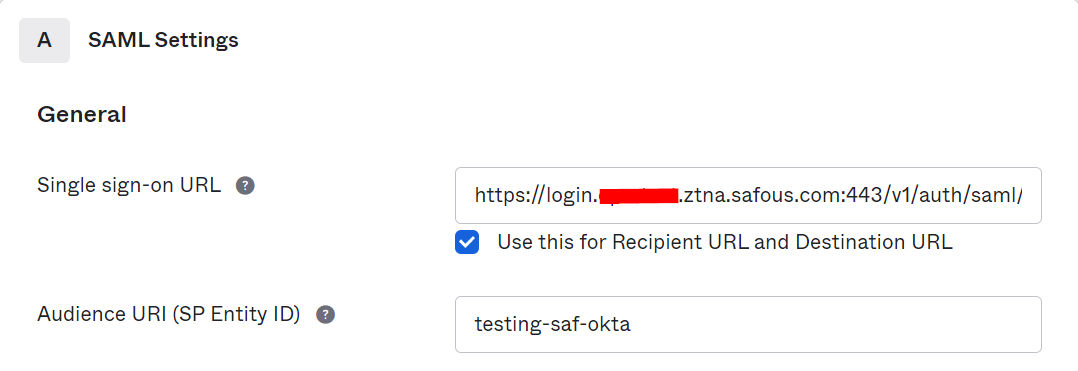
- Fill in "Single sign-on URL" and "Audience URI" with these details:
- Single sign-on URL: https://login.<tenant>.ztna.safous.com:443/v1/auth/saml/1/callback
- Audience URI: the app name that you inputted previously in step 3
- Configure Name ID Format and Attribute statements as below
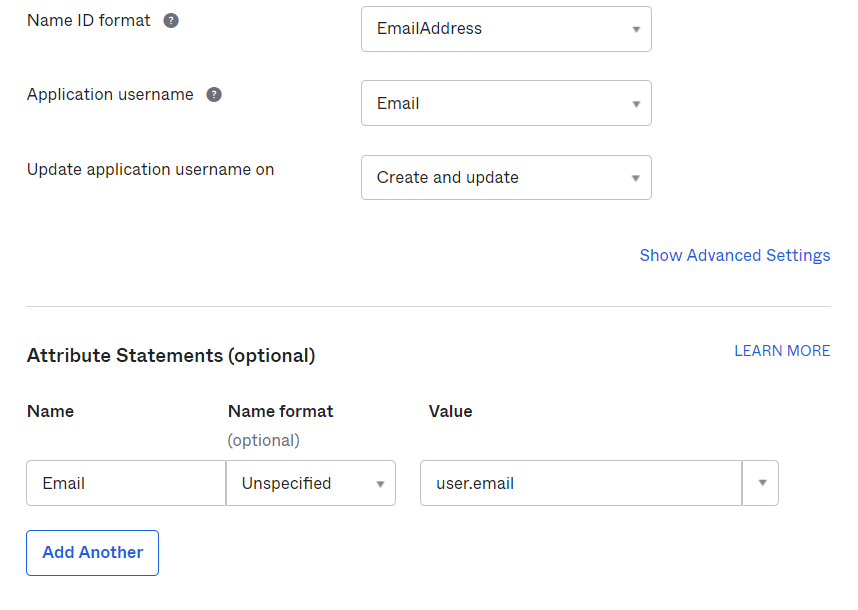
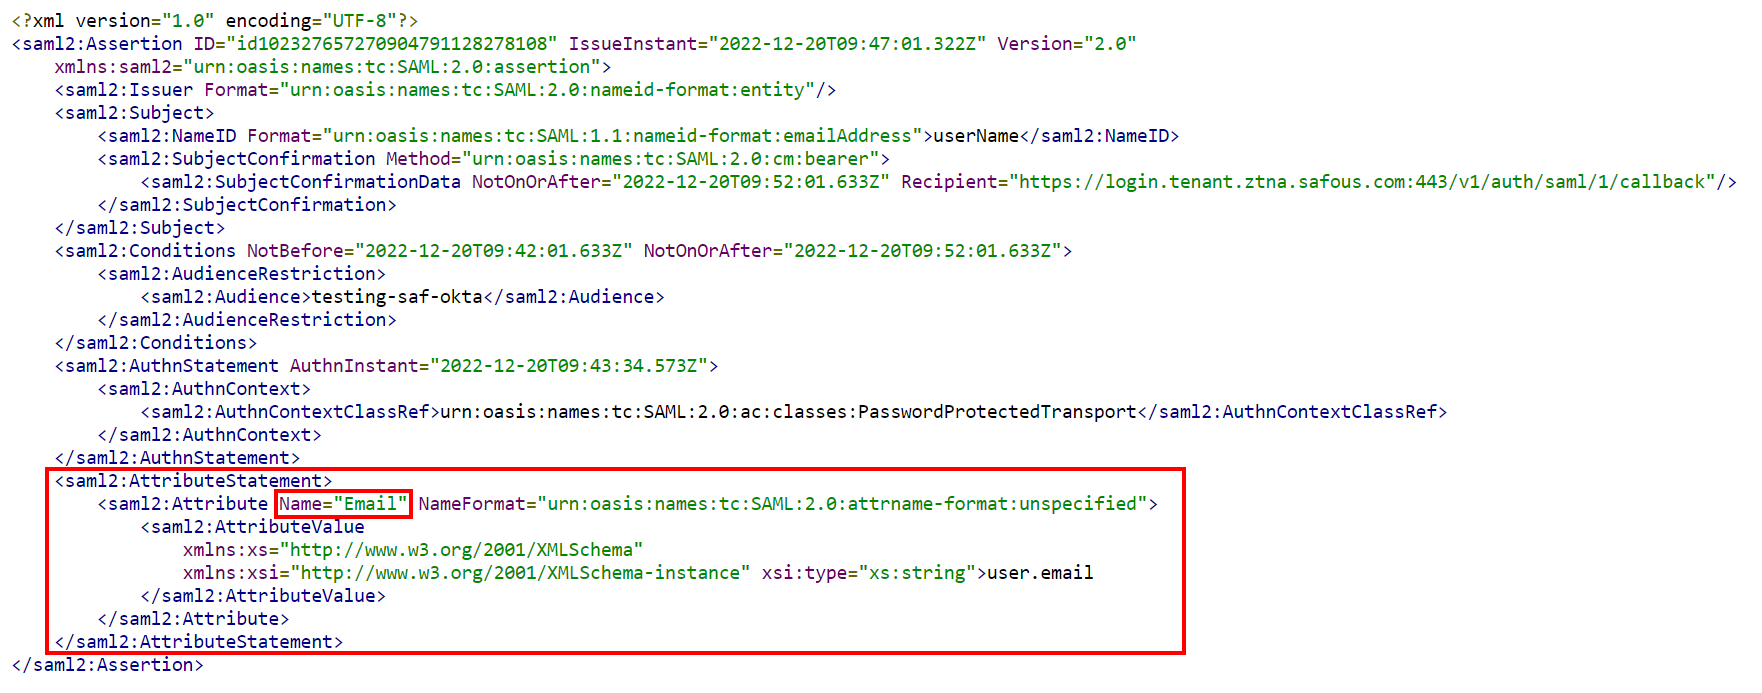
- You can check the attribute statement by clicking Preview the SAML Assertion.
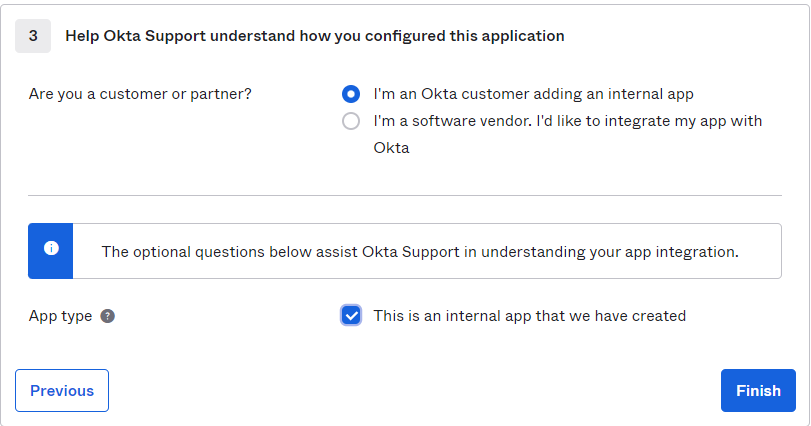
If the attribute is right, then you can proceed by clicking Next. - In the Feedback section, fill in both questions and Click Finish.
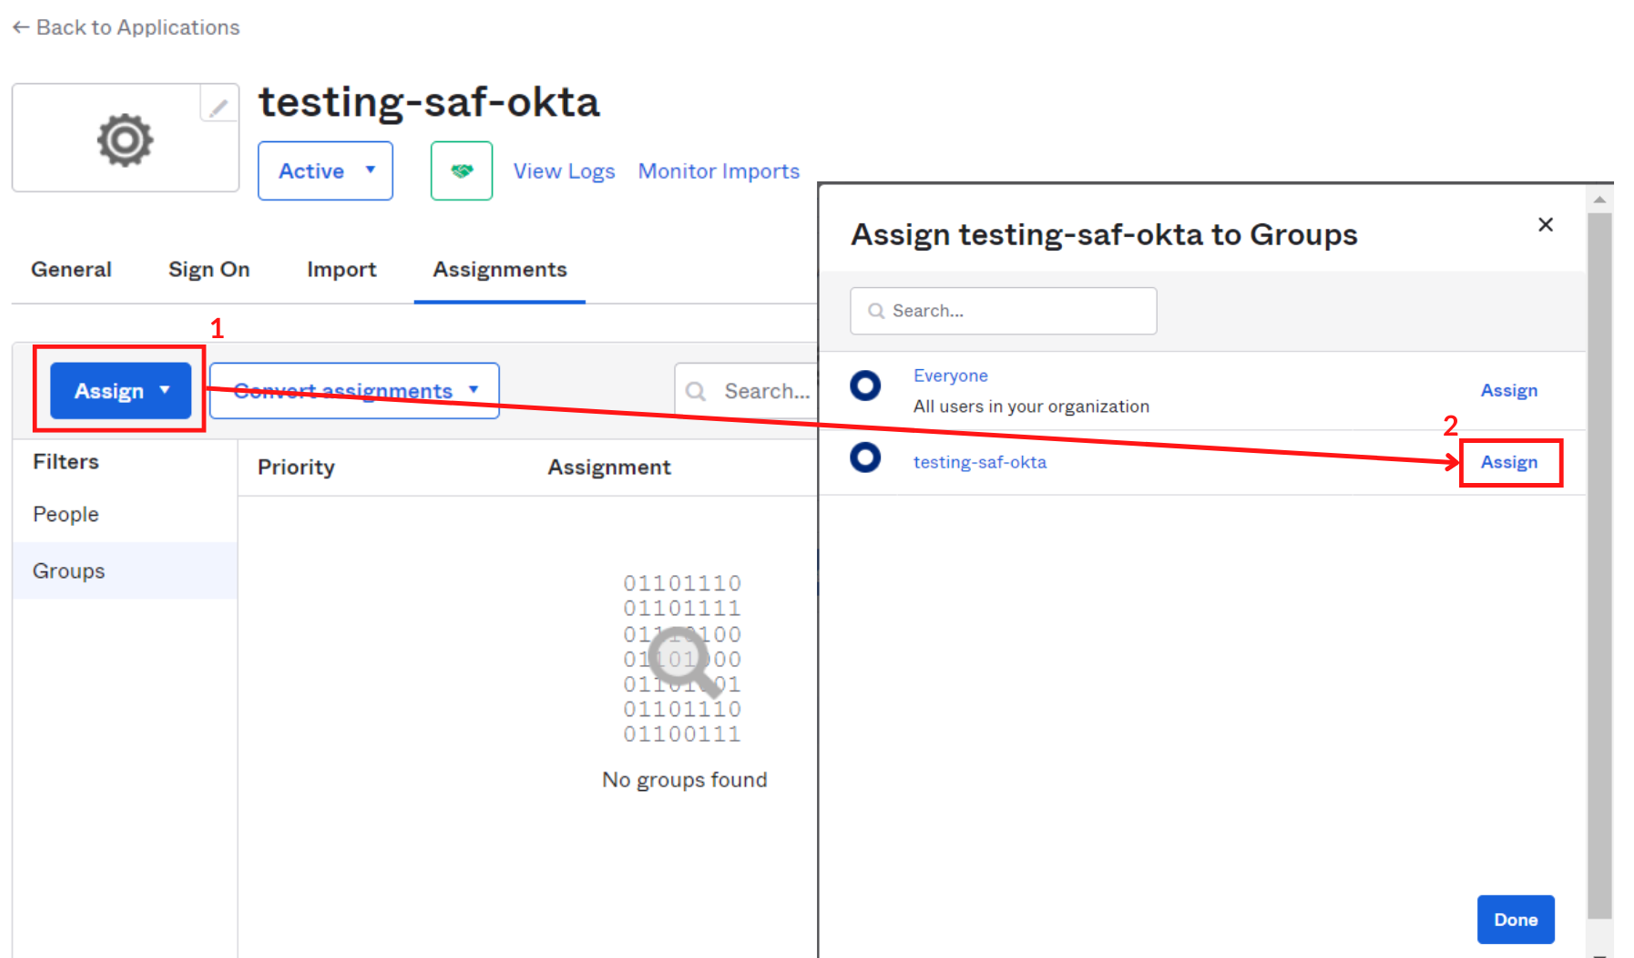
- In the application you just created, navigate to the Assignments section to designate the specific users or groups that you want to grant access to the app.
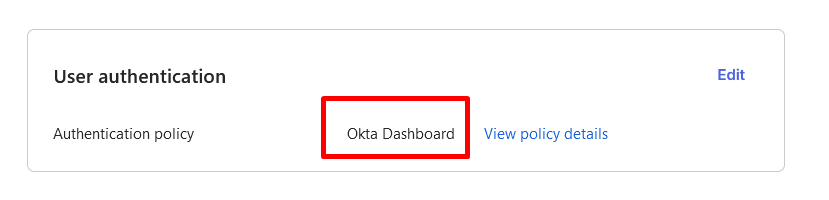
- Please make sure to change user authentication policy into Okta Dashboard, to disable the MFA of the Okta login page since we only want to use Safous MFA. You can find this configuration on the Sign On tab and scroll down to edit the user authentication option.
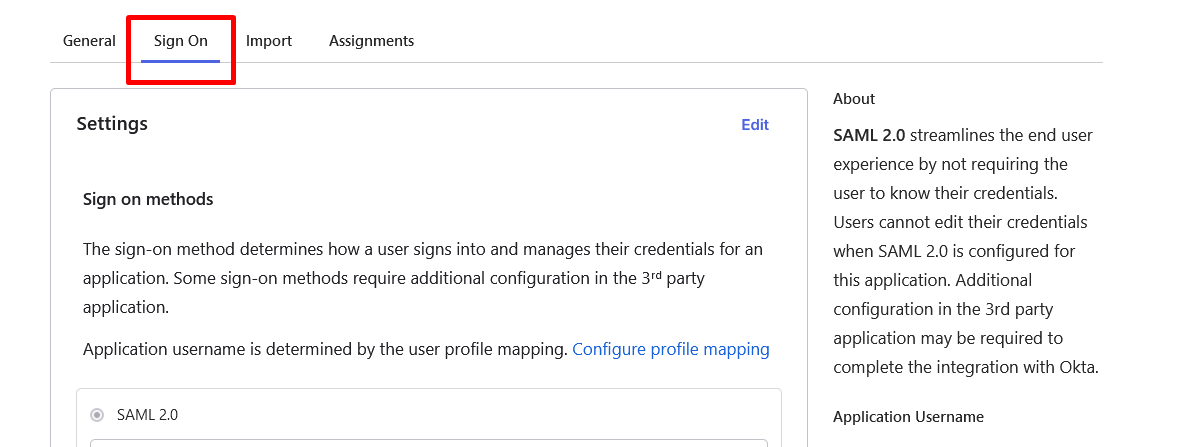
- After that, still on the Sign On tab click View SAML setup instructions. We'll use the information in the instructions to set up IdP in your Safous Admin Portal.
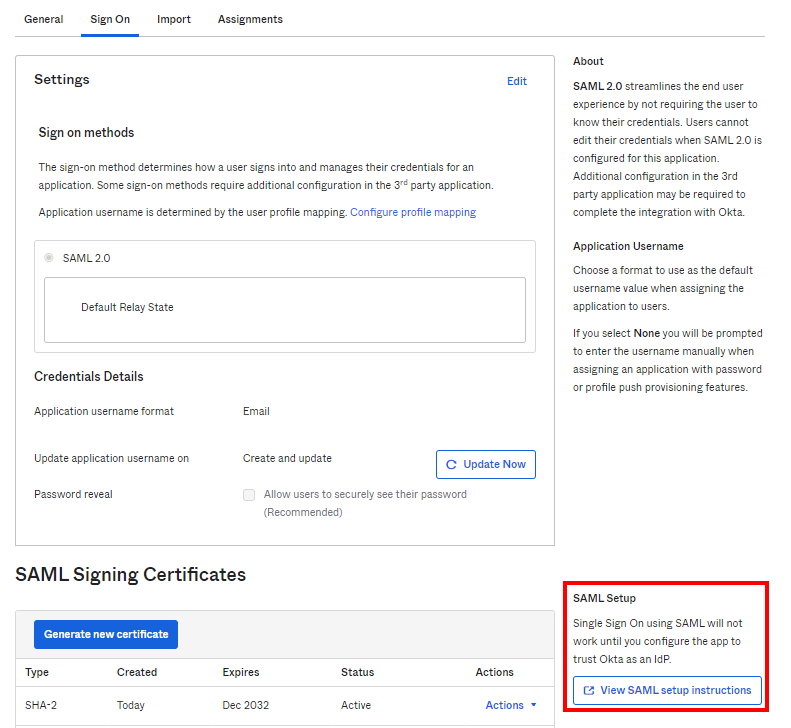
- In SAML setup instructions you can take note of these values that will be needed for configuring IdP in the Safous Admin Portal.
- Identity Provider Single Sign-On URL, which is the SSO URL.
- Identity Provider Issuer, which is the SSO Issuer.
- X.509 Certificate, which is the CA Trusted Certificate.
--------------------------------------------------------------------------------------------
Setup IdP in Safous Admin Portal
- From Safous Admin portal , Go to Settings > ZTNA > Configurations > Identity Provider. Click New IdP, it will expand the form of IDP which you will need to configure.

- Fill in the name and ensure that the status of the IdP is enabled (green).

- Choose SAML for the Identity Provider Setting.

- Fill in "Entity Issuer" with the Audience URI from your Okta Application

- Fill in "SSO Issuer" with Identity Provider Issuer that you previously took notes on.

- Fill in "SSO URL" with Identity Provider Single Sign-On URL that you previously took notes on.

- Fill in both required "Username attribute" and "Email Attribute" with your Attribute configuration in the Okta Application. In this example, we're using Email. You can also optionally map other attributes by matching it with your attribute configuration in the Okta application.

- Fill in "CA Trusted Certificate" with X.509 Certificate that you previously took notes on.

- For the rest of Safous ZTNA SAML configuration please refer to here.
- Once you are done with the configuration, click Save.

- The page will display notification to inform you that the IdP has been added successfully.

- Verify your Redirect URI is correct by comparing it with the Single Sign On URL in your Okta Application.

- If the Redirect URI is the same as the Single Sign On URL in your Okta Application, you can leave it as it is. But if it's not, then please change the Single Sign On URL in your Okta Application by accessing this section:
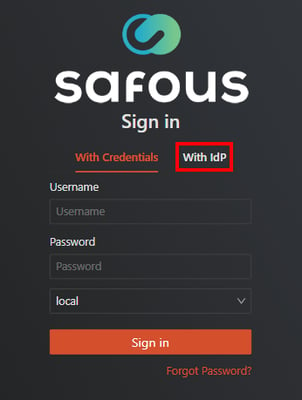
Your Okta Application > General > SAML Settings > Single Sign On URL. - If everything is configured correctly, you can log in to the user portal (https://login.<tenant>.ztna.safous.com) and choose to log in With IdP, where you will see your Okta SAML configuration.